
Purchase Return will have to be done when the purchased items are returned to the supplier, in order to update the stock and affect accounting entries.
To perform a Purchase Return, follow the steps as shown below

You will get a screen as shown below. Select Return Type as Purchase Return.

Select the Purchase Receipt against which items are to be returned and click on Get Items button. On doing this, the items received against this Purchase Receipt will get fetched.

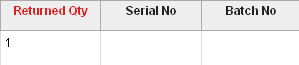
Enter the Returned Quantity. Mention the Serial No and Batch No if serial numbers and batches are maintained for the item.
Below the item table in Sales Purchase Return Wizard, you will find 3 buttons :
1. Make Stock Entry - On clicking this button, the stock will be updated in source target warehouse where the goods will be returned.
2. Make Excise Invoice - Click this button if Excise is applicable to the items being returned. This will direct you to the Journal Voucher.
3. Make Debit Note - Click this button if debit note is required.

Making a Stock Entry
The details of Supplier and the corresponding Purchase Receipt will be fetched from the Sales and Purchase Return Wizard. Just select the Source Warehouse from where goods will be returned.

The items and their returned quantity will be fetched automatically from the wizard.

Save and Submit the Stock Entry.


Making a Debit Note
Clicking on Make Debit Note in the wizard will direct you to a new Journal Voucher. Debit the amount against the supplier account head and credit the same amount against an Expense account.

Save and submit the Journal Voucher.


For more details, please visit www.erpnext.com
To perform a Purchase Return, follow the steps as shown below
You will get a screen as shown below. Select Return Type as Purchase Return.
Select the Purchase Receipt against which items are to be returned and click on Get Items button. On doing this, the items received against this Purchase Receipt will get fetched.
Enter the Returned Quantity. Mention the Serial No and Batch No if serial numbers and batches are maintained for the item.
Below the item table in Sales Purchase Return Wizard, you will find 3 buttons :
1. Make Stock Entry - On clicking this button, the stock will be updated in source target warehouse where the goods will be returned.
2. Make Excise Invoice - Click this button if Excise is applicable to the items being returned. This will direct you to the Journal Voucher.
3. Make Debit Note - Click this button if debit note is required.
Making a Stock Entry
The details of Supplier and the corresponding Purchase Receipt will be fetched from the Sales and Purchase Return Wizard. Just select the Source Warehouse from where goods will be returned.
The items and their returned quantity will be fetched automatically from the wizard.
Save and Submit the Stock Entry.
Making a Debit Note
Clicking on Make Debit Note in the wizard will direct you to a new Journal Voucher. Debit the amount against the supplier account head and credit the same amount against an Expense account.
Save and submit the Journal Voucher.
For more details, please visit www.erpnext.com
No comments:
Post a Comment